Sub-Total: $0.00


Installing Vinyl Plank Flooring on Concrete Floor

Vinyl plank flooring is a trending flooring material. Despite being 100% synthetic, vinyl planks mimic authentic flooring materials, such as natural wood and stone. It is a durable flooring material with high resistance to water and staining. Moreover, vinyl planks are affordable, and the easy installation process offers the option to “do it yourself.” Installing vinyl plank flooring over concrete is an excellent way to boost comfort and warm your space.
While this innovative flooring has a lot to offer homeowners, it’s still important to consider the pros and cons of installing vinyl flooring in your home. For example, while vinyl is extremely durable and comfortable, it cannot be refinished. If you’ve evaluated the benefits and want to install vinyl plank flooring over concrete in your home, here’s everything you need to know about the process.
Prepare for Successful Installation
You can install vinyl planks over existing flooring. The easy click-and-lock design makes it easy to secure the planks, even if you aren’t a hands-on DIYer. However, it is crucial to first evaluate the condition of the existing floor. If the surface is uneven, cracked or flawed in other ways, you must rectify the issue. If the concrete is smooth and even, simply sweep and mop the surface to remove dirt and dust.
Next, you must test the moisture levels in the concrete. If the concrete surface contains moisture, it can seep through and cause the vinyl flooring to bubble and warp.
Secure a piece of plastic wrap to the concrete surface with insulation tape, ensuring the plastic is completely flat. Wait 24 hours before assessing the plastic. If there are signs of moisture, use a dehumidifier to remove condensation from the air. It may take a day or two to dry the space.
Next, you must install an underlayment material over the concrete. Underlayment acts as a protective layer while also providing soundproofing to reduce impact sounds. Moreover, underlayment offers insulation that will keep the space warmer.
Gather the Essential Tools
For a successful vinyl plank installation, you will need the following tools and equipment:
- Measuring tape
- Sharp utility knife
- Spacers
- Markers
- Rubber mallet
- Chalk
- Tapping block
- T-square
- Brad nailer
With the right tools on hand, you are set to go.
Take Measurements and Prepare the Vinyl
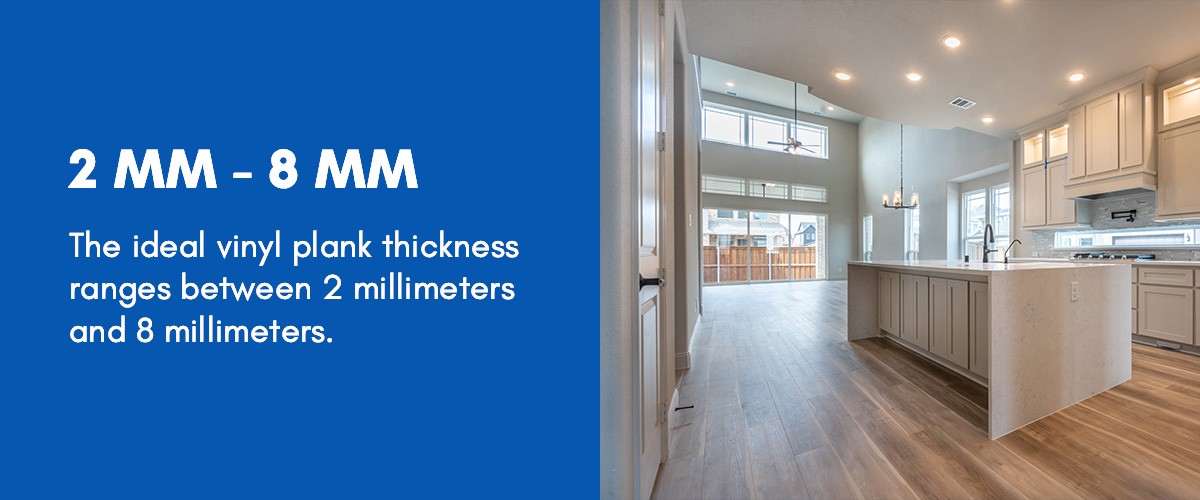
The first move in installing vinyl plank flooring over concrete is to determine the area that needs to be covered. Use a tape measure to establish the exact area you want to cover. Next, find a retailer that offers vinyl plank flooring. This flooring offers a click-lock system that closely resembles that of laminate flooring but is a little bit thinner. The ideal vinyl plank thickness ranges between 2 millimeters and 8 millimeters. For vinyl planks with thicknesses below 4 millimeters, you can enhance effective click-locking through the application of foam underlay.
On the day your flooring arrives, leave it for at least two days to acclimatize. Then, decide on the pattern you want and start cutting the flooring pieces to produce the pattern requirements. It is also crucial to mix all the planks from the boxes evenly to give a uniform look.
Use the Right Installation Techniques for Optimal Durability
While installing vinyl plank flooring is straightforward, properly fitting and securing the planks can take time. Follow each step closely to ensure durability and beautiful results.
1. Spacing
With the spacer, ensure that there is a gap of 1.3 centimeters from the wall, and start laying your first row of vinyl plank flooring starting from the left. Ensure the groove of one plank fits snugly into the tongue of the other plank. Complete the rows by interlocking the groove and tongue connectors while aligning the seams.
2. Tapping
Using a rubber mallet and a tapping block, gently tap the planks to fit seamlessly. Using the leftovers, cut terminals that are at least 6 inches or longer to start up your next row. Mix the pieces to give the flooring a uniform appearance.
3. Interlocking
At a slight angle, fit the planks to the previous row and ensure they interlock correctly. Carry on the task while ensuring the planks interlock and all the seams fit tightly. You can add spacers every few feet around the edges and lift them off once you finish the installation.
4. Re-Installing the Baseboards
Finish your vinyl plank installation by re-installing your baseboards. Finally, use a brad nailer tool to install finishing molds that cover the expansion gaps.
Vinyl Flooring Maintenance Tips
You’ll want to avoid walking on your new flooring for at least 24 hours while the adhesive dries to prevent damage. After that, you can safely enjoy your new vinyl flooring.
If you used the glue-down technique, you may need to use a scraper and a floor stripper or an acetone-based product to remove any excess glue. Spray the surface with the floor stripper or acetone product and gently scrape visible glue from the planks.
When it comes time to clean your new vinyl flooring, use a soft broom or microfiber mop to remove dust and dirt. For wet mopping, you can typically use a vinyl floor cleaning product or a solution of apple cider vinegar and water. Avoid all-purpose cleaners and harsh chemical detergents that may damage the vinyl plank’s surface. Before cleaning, make sure to consult the manufacturer’s recommended cleaning products and techniques.
Transforming Your Space With Vinyl Plank Flooring
With the right tools and some attention to detail, you can install vinyl plank flooring independently. Still, choosing high-quality vinyl planks is crucial for the best results.
All American Flooring offers an extensive selection of vinyl plank flooring in varying styles and designs. Our flooring experts can help you achieve seamless results by guiding you through the vinyl plank selection process. While you can install this unique flooring on your own, we also offer professional installation services for superior results.
Schedule a free in-home estimate to transform your home’s floors with vinyl planks.